SubstancePainter_Plugin_Study_Notes

Substance Painter Plugin 学习笔记

核心思路

需要了解学习的模块

Qml文件

文档: Substance Painter打开 Help-Docmentation-Scripting API
UI

插件骨骼

1
2
3
4
5
6
7
8
9
10
11
12
13
14
15
16
17
18
19
20
21
22
23
24
25
26
27
28
29
30
31
32
33
34
35
36
37
38
39
40
41
42
43
44
45
46
47
48
49
50
51
52
53
54
55
56
57
58
59
60
61
62
63
64
65
66
67
68
69
70
71
72
73
74
75
76
77
78
79
80
81
82
83
84
85
86
87
88
89
90
91
92
93
94
95
96
97
98
99
100
101
102
103
104
105
106
107
108
109
110
111
112
113
114
115
116
117
118
119
120
121
122
123
124
125
126
127
128
129
130
131
132
133
134
135
136
137
138
139
import QtQuick 2.2
import Painter 1.0

PainterPlugin {
// starts a timer that will trigger the 'onTick' callback at regular interval
// 启动一个计时器,该计时器将定期触发“ on tick”回调
tickIntervalMS: -1 // -1 禁用(默认值)

// starts a JSON server on the given port:
// 在给定的端口上启动json服务器
// you send javascript that will be evaluated and you get the result in JSON format
//您发送将被评估的javascript,并以json格式获取结果
jsonServerPort: -1 // -1 禁用(默认值)

Component.onCompleted: {
// Called after the object has been instantiated.
// 在实例化对象之后调用。
// This can be used to execute script code at startup,
// 可用于在启动时执行脚本代码,
// once the full QML environment has been established.
// 现已建立完整的qml环境
alg.log.info("Component.onCompleted")
}

onTick: {
// Do something at each tick, depending on tickIntervalMS value
// 在每个滴答声中有一些东西,具体取决于滴答间隔ms值
alg.log.info("onTick")
}

onConfigure: {
// Do something when the user request the plugin configuration panel
// 当用户请求插件配置面板时执行某些操作
alg.log.info("onConfigure")
}

onApplicationStarted: {
// Called when the application is started
// 启动应用程序时调用
alg.log.info("onApplicationStarted")
}

onNewProjectCreated: {
// Called when a new project is created, before the onProjectOpened callback
// 在创建新项目时调用,在on project打开回调之前调用
alg.log.info("onNewProjectCreated")
}

onProjectOpened: {
// Called when the project is fully loaded
// 在项目完全加载时调用
alg.log.info("onProjectOpened")
}

onProjectAboutToClose: {
// Called before project unload
// 在项目卸载之前调用
alg.log.info("onProjectAboutToClose")
}

onProjectAboutToSave: function(destinationUrl) {
// Called before a save, 'destination_url' parameter contains the save destination
// 在保存之前调用,“目标网址”参数包含保存目标
alg.log.info("onProjectAboutToSave: "+destinationUrl)
}

onProjectSaved: {
// Called after the project was saved
// 项目保存后调用
alg.log.info("onProjectSaved")
}

onComputationStatusChanged: function(isComputing) {
// Called when the state of the engine computing stacks content change.
// 当引擎计算堆栈的状态更改内容时调用。
// If the stack content is computed, 'isComputing' parameter will be false
// 如果计算堆栈内容,则“正在计算”参数为false
alg.log.info("onComputationStatusChanged: "+isComputing)
}

onExportAboutToStart: function(maps) {
// Called just before the export process starts.
// 在导出过程开始之前调用。
// 'maps' is the list of filepaths expected to be written.
// “映射”是预期要写入的文件路径的列表。
alg.log.info("onExportAboutToStart: ")
for (var stackName in maps) {
alg.log.info(stackName);
for (var filePath in maps[stackName]) {
alg.log.info(maps[stackName][filePath]);
}
}

// Example:
// Open the 'PreviewSphere' sample, set 'C:/tmp' as export path, choose 'png' as export
// 打开“预览球”示例,将“ c:/ tmp”设置为导出路径,选择“ png”作为导出
// format and select the 'PBR MetalRough' config, the example above will output:
// 格式化并选择“ pbr metal raw”配置,以上示例将输出:

// onExportAboutToStart:
// Sphere
// c:/tmp/Sphere_Sphere_BaseColor.png
// c:/tmp/Sphere_Sphere_Roughness.png
// c:/tmp/Sphere_Sphere_Metallic.png
// c:/tmp/Sphere_Sphere_Normal.png
// c:/tmp/Sphere_Sphere_Height.png

// Please note the 'Opacity' and 'Emissive' maps are not listed here because they
// 请注意,此处未列出“不透明”和“发射”地图,因为它们
// can not be exported with this sample while the actual export will warn about it.
// 不能与该样品一起出口,但实际出口会发出警告。
}

onExportFinished: function(status, maps) {
// Called right after the export process ends.
// 在导出过程结束后立即调用
// 'status' is the error status returned by the process. Available values are:
// “状态”是进程返回的错误状态。,可用值为:
// - Export.Status_Ok
// - Export.Status_Warn
// - Export.Status_Error
// - Export.Status_Canceled
// 'maps' is the list of filepaths effectively exported.
// “映射”是有效导出的文件路径的列表。
alg.log.info("onExportFinished: ")
if (status != Export.Status_Ok) {
alg.log.error("Export failed.")
}
else {
for (var stackName in maps) {
alg.log.info(stackName);
for (var filePath in maps[stackName]) {
alg.log.info(maps[stackName][filePath]);
}
}
}
}

}
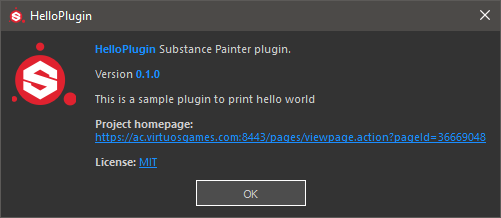
  • Plugin meta data:
    Information about the plugin can be provided by creating a plugin.json file in the plugin directory. Available properties are:
    可以通过在plugin目录中创建一个plugin.json文件来提供有关该插件的信息。,可用属性为:
    description: plugin description, displayed in the plugin about dialog.
    url: project homepage, displayed in the plugin about dialog. Warning, the scheme is mandatory to create a clickable link.
    version: plugin version.
    license: plugin license.
    min_api_version: required minimal scripting API version.
    Example:
    1
    2
    3
    4
    5
    6
    {
    "description": "This is a sample plugin",
    "url": "https://www.allegorithmic.com",
    "version": "0.1.0",
    "license": "<a href=\"https://opensource.org/licenses/MIT\">MIT</a>"
    }

定制UI

1
2
3
4
5
6
7
8
9
10
11
12
13
14
15
16
17
18
19
20
21
22
import QtQuick 2.2
import Painter 1.0

PainterPlugin {
// 在实例化对象之后调用。
// 可用于在启动时执行脚本代码,
// 建立环境
Component.onCompleted: {
// 创建一个toolbar 按钮
var t = alg.ui.addToolBarWidget("dock.qml");
t.rectangle.color = "blue"
t = alg.ui.addToolBarWidget("dock.qml");
t.rectangle.color = "green"
t = alg.ui.addToolBarWidget("dock.qml");
t.rectangle.color = "yellow"
t = alg.ui.addToolBarWidget("dock.qml");
t.rectangle.color = "purple"
// 创建停靠小部件
alg.ui.addDockWidget("dock.qml");
}

}
1
2
3
4
5
6
7
8
9
10
11
12
13
14
15
16
17
18
19
20
21
22
23
24
25
26
27
28
import QtQuick 2.3
import QtQuick.Window 2.2
import QtQuick.Layouts 1.2

Item {
width: 24
height: 24
objectName: "My plugin UI"
property alias rectangle: rect

Rectangle {
id: rect
anchors.fill: parent
color: "red"
MouseArea {
id: mouseArea
anchors.fill: parent
onClicked: {
var ok = alg.mapexport.showExportDialog();//打开导出窗口 alg是指Javascript API
if (ok) {
alg.log.info("Export successful!")
} else {
alg.log.warn("Export cancelled!")
}
}
}
}
}

Javascript API

例子1

substance painter hello world 窗口

  • 首先需要有一个定义主入口点的qml文件main.
  1. C:\Users\sunyuxiang\Documents\Allegorithmic\Substance Painter\plugins
  2. 在此处创建一个名为“ HelloPlugin”的文件夹
  3. 在插件内,创建两个文件
    * plugin.json 
    * main.qml 
  4. 打开main.qml文件写入
1
2
3
4
5
6
7
8
9
10
import QtQuick 2.2
import Painter 1.0

PainterPlugin
{
Component.onCompleted:
{
alg.log.info("hello world!")//注意这里,alg.log.info()等于python里面的print()
}
}
  • 填写JSON文件:
  1. JSON文件包含插件的元数据,在这里显示.

  2. 我们知道json文件是键值对,观察一下现有插件的json文件,然后修改一后面的值改为.
1
2
3
4
5
6
{
"description": "This is a sample plugin to print hello world",
"url": "https://test",
"version": "0.1.0",
"license": "<a href=\"https://opensource.org/licenses/MIT\">MIT</a>"
}
  • 然后打开substance painter
  1. 可以看到log文件已经打印出了hello world
  2. plugins下的对应插件名字下面的about也可以正常工作
  3. 现在 我们可以看到插件的加载,还可以看到plugin.json文件的关于窗口信息.
  • 添加一个窗口
  1. 在我们的HelloPlugin目录中创建一个HelloWorldWindow.qml.
  2. 编辑文件,添加代码来定义一个简单的窗口。
1
2
3
4
5
6
7
8
9
import AlgWidgets 1.0 //窗口类导入

AlgWindow
{
// 属性就像对象类型上的变量
id: window//对应 main.qml的id 这个id很有用,因为它允许我们在插件的其他位置引用该对象,访问其可见性之类的属性。
title: "hello world window"
visible: true
}
  • 现在,我们有一个简单的窗口,但是在看到窗口之前,我们需要在main.qml文件中实例化它。
  1. 编辑main.qml
    1
    2
    3
    4
    5
    6
    7
    8
    9
    10
    11
    12
    13
    14
    15
    import QtQuick 2.2
    import Painter 1.0

    PainterPlugin
    {
    HelloWorldWindow// 在这里声明一个window,HelloWorldWindow指向HelloWorldWindow.qml
    {
    id: window//对应 HelloWorldWindow.qml的id
    }

    Component.onCompleted:
    {
    alg.log.info("hello world!")
    }
    }
  2. 现在打开substance painter 禁用插件在启用插件就会看到该窗口弹出,这是因为在加载插件时首先实例化该窗口(?),我们稍后将解决此问题。
  • 创建一个按钮:
  1. 接下来创建一个按钮来替代禁用/启用
  2. 打开“ HelloWorldWindow.qml”文件。
  3. 我们将添加三件事:
    * 一系列的布局元素。 
    * 一个标签。 
    * 一个按钮
1
2
3
4
5
6
7
8
9
10
11
12
13
14
15
16
17
18
19
20
21
22
23
24
25
26
27
28
29
30
31
32
33
34
35
36
37
38
39
40
41
42
43
44
45
46
47
48
49
50
51
52
53
54
import AlgWidgets 1.0 

//下面这些模块是UI布局需要的
import QtQuick 2.7
import QtQuick.Layouts 1.3
import "."

AlgWindow
{
id: window//对应 main.qml的id
title: "hello world window"
visible: true//注意这里

ColumnLayout //也可以用 RowLayout这里定义了一系列的布局元素
{
id: horizontalLayout
anchors.fill: parent

Rectangle //这里定义了一系列的布局元素
{
id: buttonBar
anchors.left: parent.left
anchors.right: parent.right

ColumnLayout//也可以用 RowLayout这里定义了一系列的布局元素
{
anchors.fill:parent

AlgLabel//一个标签
{
id: buttonLabel
font.pixelSize: 14
font.bold: true

text: "Press Me"
}

AlgButton//一个按钮
{
text: "Say Hello!"
//Layout.preferredWidth: Style.widgets.buttonWidth

onClicked:
{
alg.log.info("hello World")
}
}


}
}
}
}
}
1. QML窗口是使用一系列嵌套的布局对象创建的-为了达到我们的目的,我们将使用列,矩形和行。 
2. 我们需要添加其他导入语句来访问这些对象类型-QtQuick和QtQuick.Layouts。
3. 该列表示总体布局-元素将按照添加顺序堆叠在此形状中。 
4. 矩形允许我们使用子布局填充此列的分区。 
5. 最后,行布局允许我们添加将按照添加顺序从左到右呈现的元素。 
6. 在行布局中添加AlgLabel和AlgButton将两个新元素添加到我们的窗口中。 
7. 最后,为按钮定义“ onClicked”事件将替换启动时登录main.qml的位置。 
  • 重新加载脚本:
    可以使用painter中的Plugins-> HelloPlugin-> Reload 菜单即时重新加载脚本。在后面debug和尝试过程中这个超级有用,避免了我们要重新开关软件。

  • 将插件添加到工具栏:

  1. 现在如果关闭插件窗口,则必须通过reload插件才能再次打开插件窗口。
  2. 让我们在工具栏上添加一个按钮,来替代每次reload调用窗口。
  3. 工具栏中的按钮将非常简单,要做的就是在按下插件窗口时切换可见性。
  4. 首先,我们将通过改变visible值的true改为false,让插件窗口不会加载自动弹出。
  5. 创建一个名为“ toolbar.qml ” 的新文件,并且与我们之前所做的类似,仅一排,带有一个按钮。
    比较重要的是-插件加载时,属性变量“ windowReference”将由我们的插件填充。
    由于windowReference在本地以null开头,因此我们稍后将对其的调用包装在try / catch块中。
    如果脚本中其他地方的内容使我们无法创建窗口,那么这将阻止崩溃,我们可以将信息打印到控制台。
    1
    2
    3
    4
    5
    6
    7
    8
    9
    10
    11
    12
    13
    14
    15
    16
    17
    18
    19
    20
    21
    22
    23
    24
    25
    26
    27
    import QtQuick 2.7
    import QtQuick.controls 2.0
    import AlgWidgets 1.0

    Row //现在是横向的如果需要侧边的话就是AlgToolBarButton
    {
    property var windowReference : null

    Button
    {
    id: rect
    width: 30
    height: 30

    onClicked:
    {
    try
    {
    windowReference.visible = true
    }
    catch(err)
    {
    alg.log.exception(err)
    }
    }
    }
    }
  • 最后,在“ main.qml”文件中,我们将添加一个新的工具栏小部件,该小部件将把“ toolbar.qml”实例化为工具栏上的按钮。
    我们还使用其ID将HelloWorldWindow实例分配给工具栏按钮中的windowReference变量。
    1
    2
    3
    4
    5
    6
    7
    8
    9
    10
    11
    12
    13
    14
    15
    16
    17
    18
    19
    import QtQuick 2.2
    import Painter 1.0

    PainterPlugin
    {
    // 在这里声明一个window,HelloWorldWindow指向HelloWorldWindow.qml
    HelloWorldWindow
    {
    id: window//对应 HelloWorldWindow.qml的id
    }

    Component.onCompleted:
    {
    var qmToolbar = alg.ui.addWidgetToPluginToolBar("toolbar.qml")
    qmToolbar.windowReference = window//这里调用了window

    }

    }
  • 这就是向Substance Painter添加基本插件的小例子.
  • ref:http://peterhanshawart.blogspot.com/2017/11/making-hello-world-substance-painter.html

例子2

1
2
3
4
5
6
7
8
9
10
11
12
13
14
15
16
17
18
19
20
21
22
23
24
25
26
27
28
29
30
31
32
33
34
35
36
37
38
AlgWindow
{
Item
{
Item
{
Row
{
Alglabel {}
AlgTextInput {}
}
Row
{
AlgComboBox {}
AlgLabel {}
AlgComboBox {}
}
Row
{
AlgCheckBox {}
}
}
GridView
{
ListElement {}
}
Item
{
Row
{
Rectangle {}
FileDialog {}
AlgButton {}
AlgButton {}
}
}
}
}

pysbs模块

pysbs文档链接

pysbs模块介绍:pysbs是.sbs文件的Python API,pysbs提供了无需使用Substance Designer应用程序即可生成或修改物质的方法,只需使用Python编写脚本即可。

它有两个主要组件:

  • 命令行工具.这是一组命令行工具,用于烘焙网格物体的图,对物质进行简单的修改,创建物质档案并绘制图。
  • Pysbs-Python API,Python API是一个python软件包,用于读取和修改sbs文件,例如从多种物质组装复合材料或在文件中批量重命名节点。
例子

批量修改sbs文件的图表尺寸

1
2
3
4
5
6
7
8
9
10
11
12
13
14
15
16
17
18
19
20
21
22
23
24
25
26
27
28
from pysbs import context, substance, sbsenum

sbs_mtls = [] # Your list of sbs files to process.

def set_sbs_graph_to_relative(sbs_path):
# Build doc.
ctx = context.Context()
sbs_doc = substance.SBSDocument(ctx, sbs_path)
sbs_doc.parseDoc()

# Get your graph.
graph = sbs_doc.getSBSGraphList()[0]

# Change the outputsize inheritance value.
# Bug: The aRelativeTo argument doesn't appear to do anything.
#
# https://docs.substance3d.com/sat/pysbs-python-api/api-content/libraries/sbsenum
graph.setBaseParameterValue(
aParameter=sbsenum.CompNodeParamEnum.OUTPUT_SIZE,
aParamValue=[sbsenum.OutputSizeEnum.SIZE_1, sbsenum.OutputSizeEnum.SIZE_1],
aRelativeTo=sbsenum.ParamInheritanceEnum.PARENT
)

# Save pkg.
sbs_doc.writeDoc()

for pkg in sbs_mtls:
set_sbs_graph_to_relative(pkg)